Download Files
| Document Title | Description | Link |
|---|---|---|
| Pre-Requisite Checklist | Ensure a smooth Ootbi setup with our 15-minute Box-to-Backup Checklist, covering all key steps. | |
| Installation Guide | Get the Ootbi appliance up and running with an Installation Guide, from setup to final configuration. | |
| Support One-Pager | Access essential FAQs and support information for a seamless operation of your Object First solution. |
Guide SIDE A
1. Box Contents

2. Racking

1. Mount outer rails in rack
2. Install inner rails on Ootbi
3. Slide Ootbi into rack
4. OPTIONAL: Install thumb screw lock (not included in packaging)
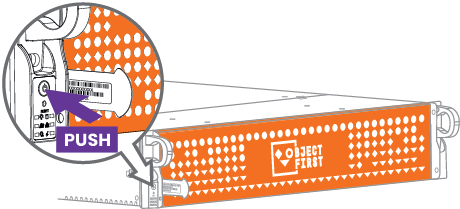
3. Front Bezel

4. Cables

1. Connect network cables 10GBASE-T (1a) or 10G SFP+ (1b)
2. Connect IPMI
3. Connect power cables
5. Connect via Remote (IPMI) or Local Console
Option A — Remote (IPMI) Console
1. Power ON
2. Log into IPMI console
• Get IPMI IP address from the DHCP server
• IPMI MAC address is on a tag
• Username: ADMIN
• Password can be found on tag
• Type https://ipmi_ip_address into a web browser to log into IPMI console
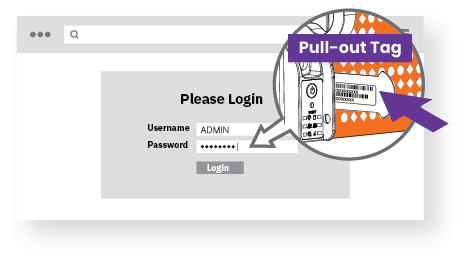
3. Remote Console
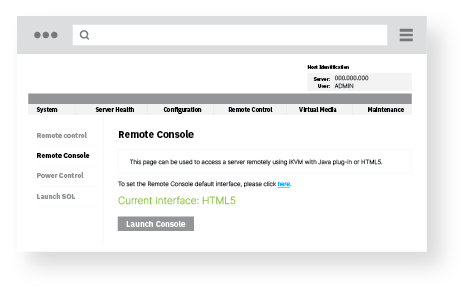
Click Remote Control menu, then Launch Console
Option B — Local Console
1. Connect VGA-compatible monitor and keyboard to Ootbi
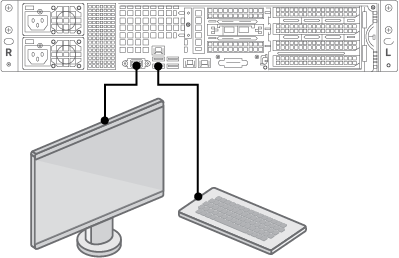
2. Power ON

6. Appliance Deployment

Choose Setup New Cluster or Join To Cluster and follow wizard
Required information:
• Cluster IP address
• 2x interface IP address
• Cluster name
• Admin password

7. Creating S3 Key and Bucket
Log into Management Console with Web browser using cluster IP address
Login: objectfirst
Password:

↓ Create an S3 Access Key


↓ Create a Bucket

Guide SIDE B
1. Launch Veeam Backup & Replication Console
2. Add Ootbi Repository
Required information:
• Repository name
• Service point IP address
• Ootbi S3 access key
• Ootbi bucket name

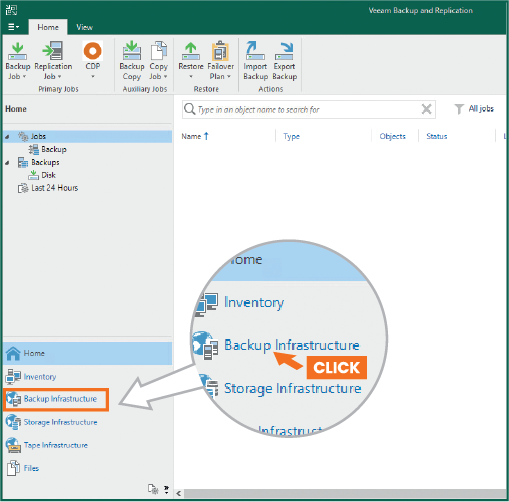
Click Backup Infrastructure. Then click Add Repository.

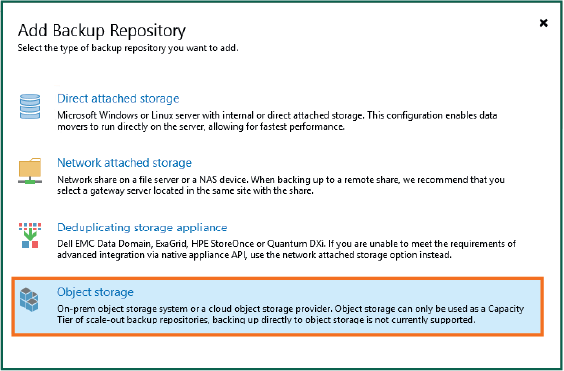
2.1. Select Object storage
2.2. Select S3 Compatible object storage

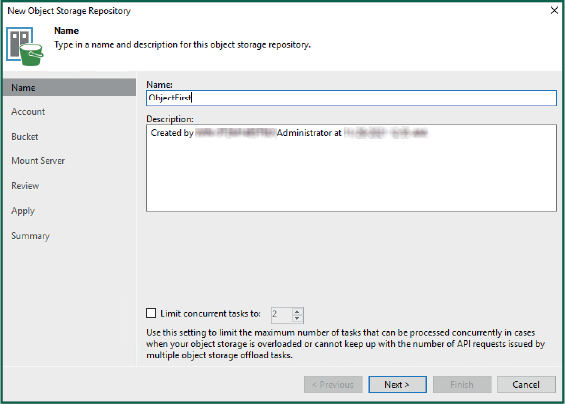
2.3. Name object storage repository
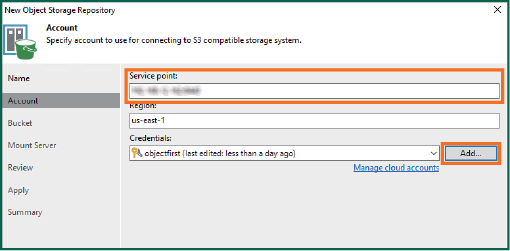
2.4. Enter IP address of appliance, keep the default us-east-1 region setting, and add S3 credentials
2.5. Select a bucket

2.6. Select or create new folder

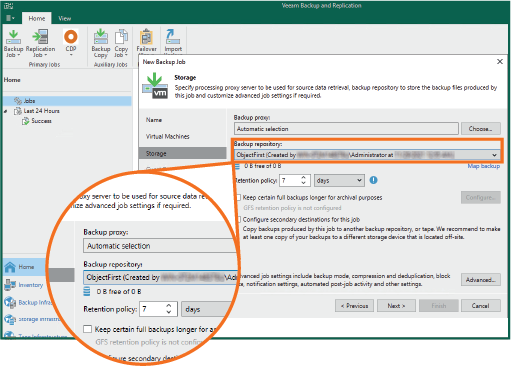
3. Select Created Repository for Backup and/or Copy Jobs
Object First Support: FAQ
How to Contact Object First Support?
- Through our website’s support portal at https://objectfirst.com/support/
- Via email at [email protected]
- By calling our US number: +1 (844) 569-0653
The team provides support, 24 x 365 days a year, to address any support issues or questions.
How Do We Prioritize Tickets?
| Severity Level | Description | Response Time |
|---|---|---|
| Severity 1 | Ootbi is not available or server is down | 1 Hour |
| Severity 2 | Ootbi is running in degraded state | 2 Hour |
| Severity 3 | Ootbi is running. General questions and consultations | 4 Business Hours* |
How does Object First Support Collaborate with Veeam?
- We work closely with Veeam to ensure seamless integration and optimal performance. Our collaboration with Veeam is built on a deep understanding of their products.
- Joint investigations are dependent on customers having both Object First and Veeam support.
How are We Different from Other Storage Vendors?
- We liaise directly with Veeam to provide a seamless support experience and communication. Unlike other vendors, we are involved in the case and actively communicate with Veeam.
What are Other Resources?
The Object First Help Center, https://objectfirst.com/help/, serves as another resource to ensure a smooth deployment and overall product use. You can find the Object First Quick Start Guide, User Guide, How-To Guides, Support & Troubleshooting info, as well as Release Notes on this page.
Service and Support Information
Each Ootbi Unit comes with a 3-year service and support for labor and parts. Our Ootbi warranty service and support includes next business day response, once the issue has been received, diagnosed, and defective parts shipped.