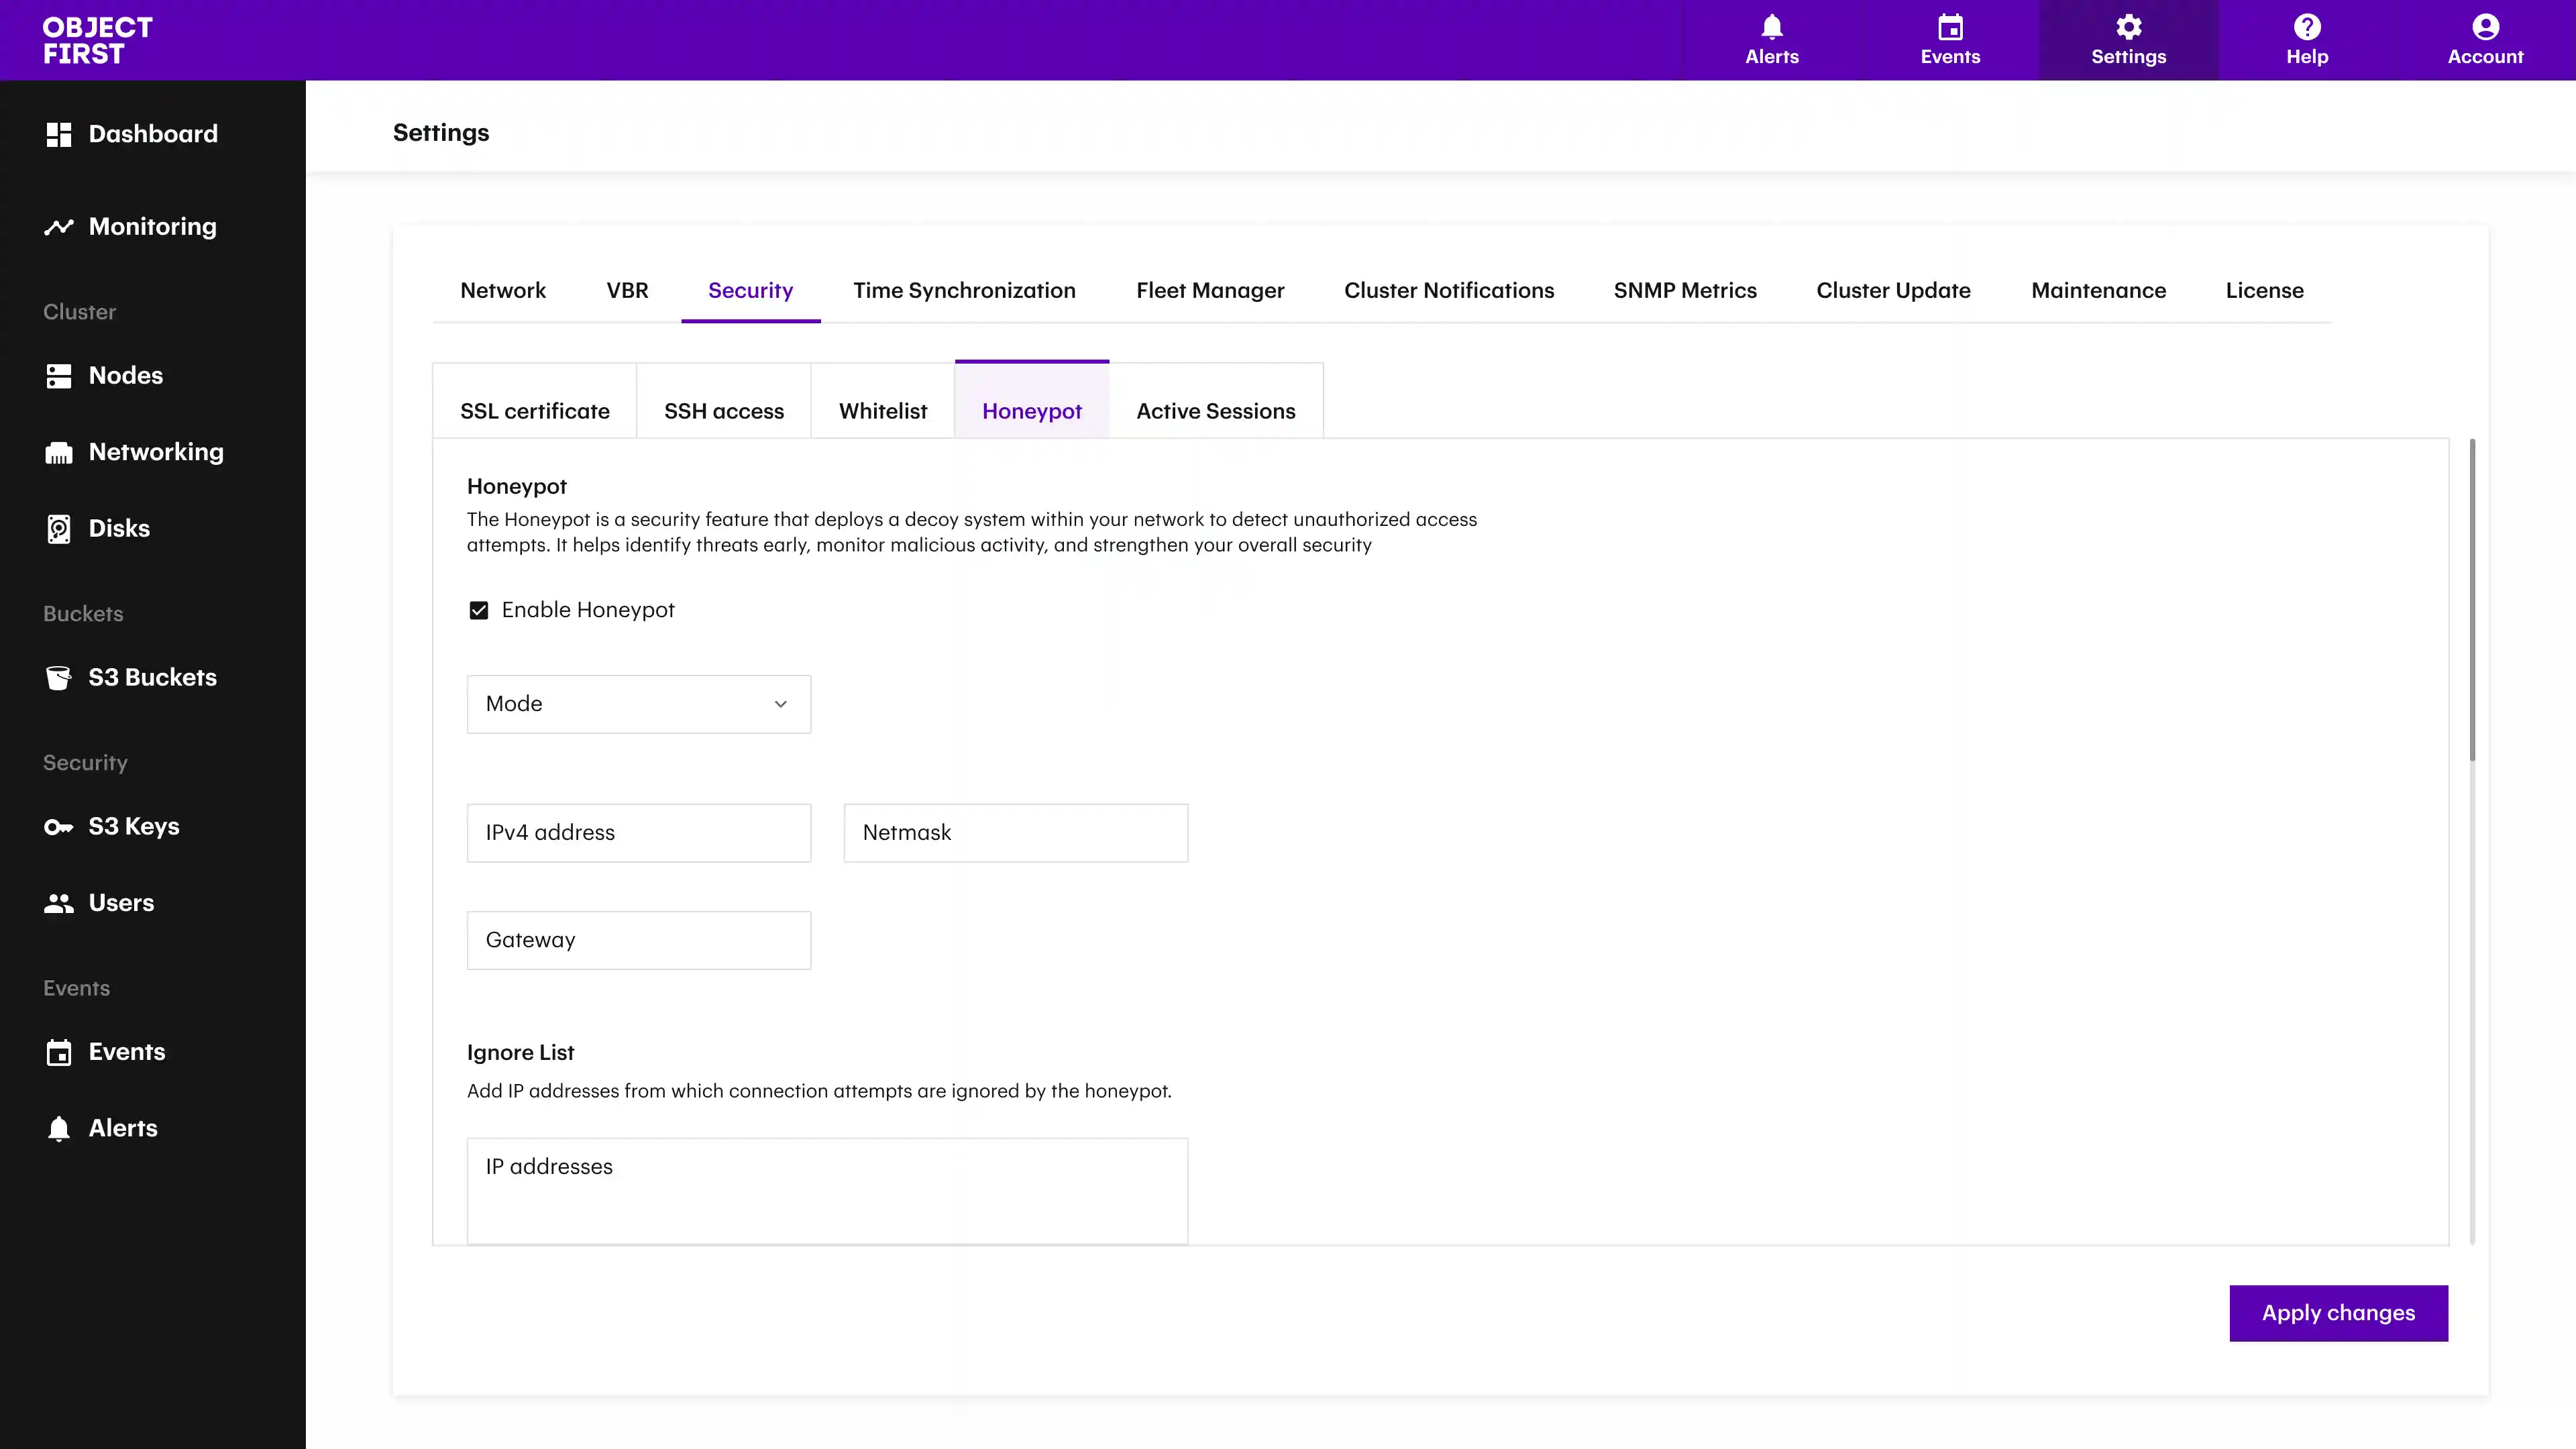
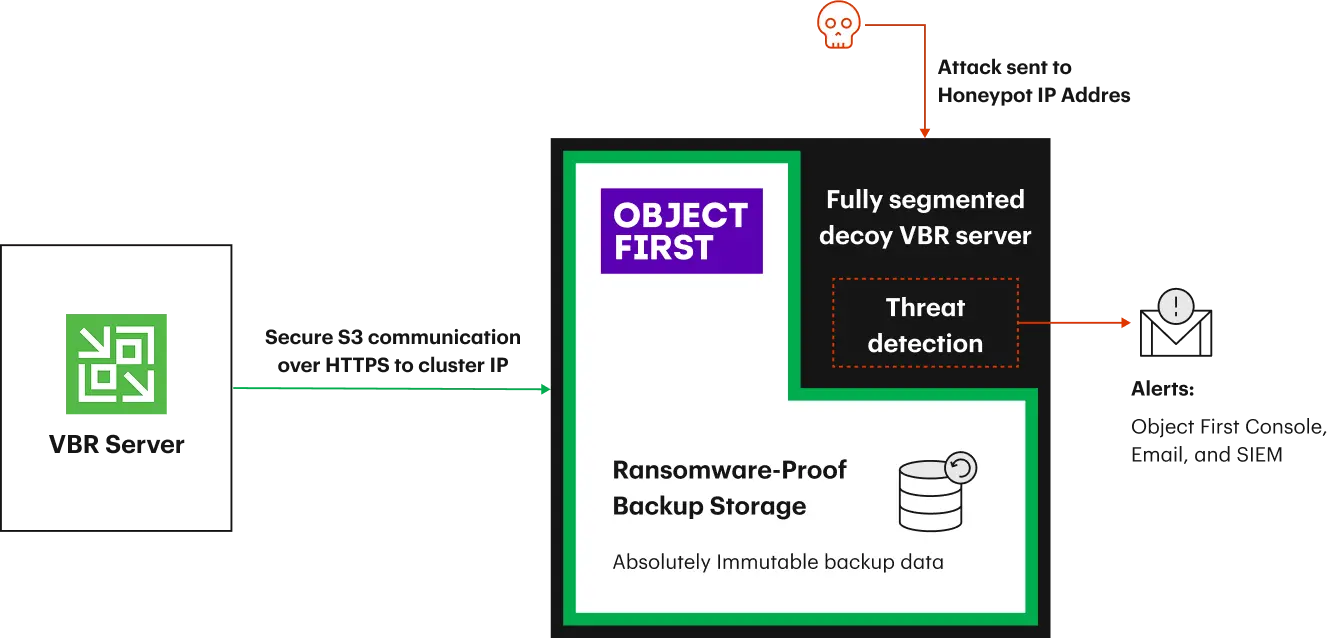
Early Detection via Veeam Decoys
The Object First Honeypot traps bad actors by mimicking a Veeam Backup & Replication (VBR) server and can be deployed in five clicks. This decoy attracts and identifies unauthorized users conducting scans, probes, or login attempts, and any unusual behavior triggers in-product alerts that can be sent via email or to a SIEM. Early warning and detection has never been easier.
Threat Intelligence with Zero Risk
Third-party penetration testing confirms that Honeypot introduces no additional risk to the Object First cluster or immutable backup data. The feature is logically isolated, providing threat intelligence without expanding the attack surface. This ensures that the decoy captures malicious activity, but the storage environment remains inaccessible and secure.
Security Without Complexity
Activating Honeypot requires no third-party tools or specialized expertise. Built directly into the Cluster Manager of all Object First appliances, the feature reinforces our Secure by Default posture and takes only five clicks to set up:
Step 1
Step 2
Step 3

Step 4
- DHCP: Automatically assigns an IP address.
- Static: Manually set an IP and netmask.
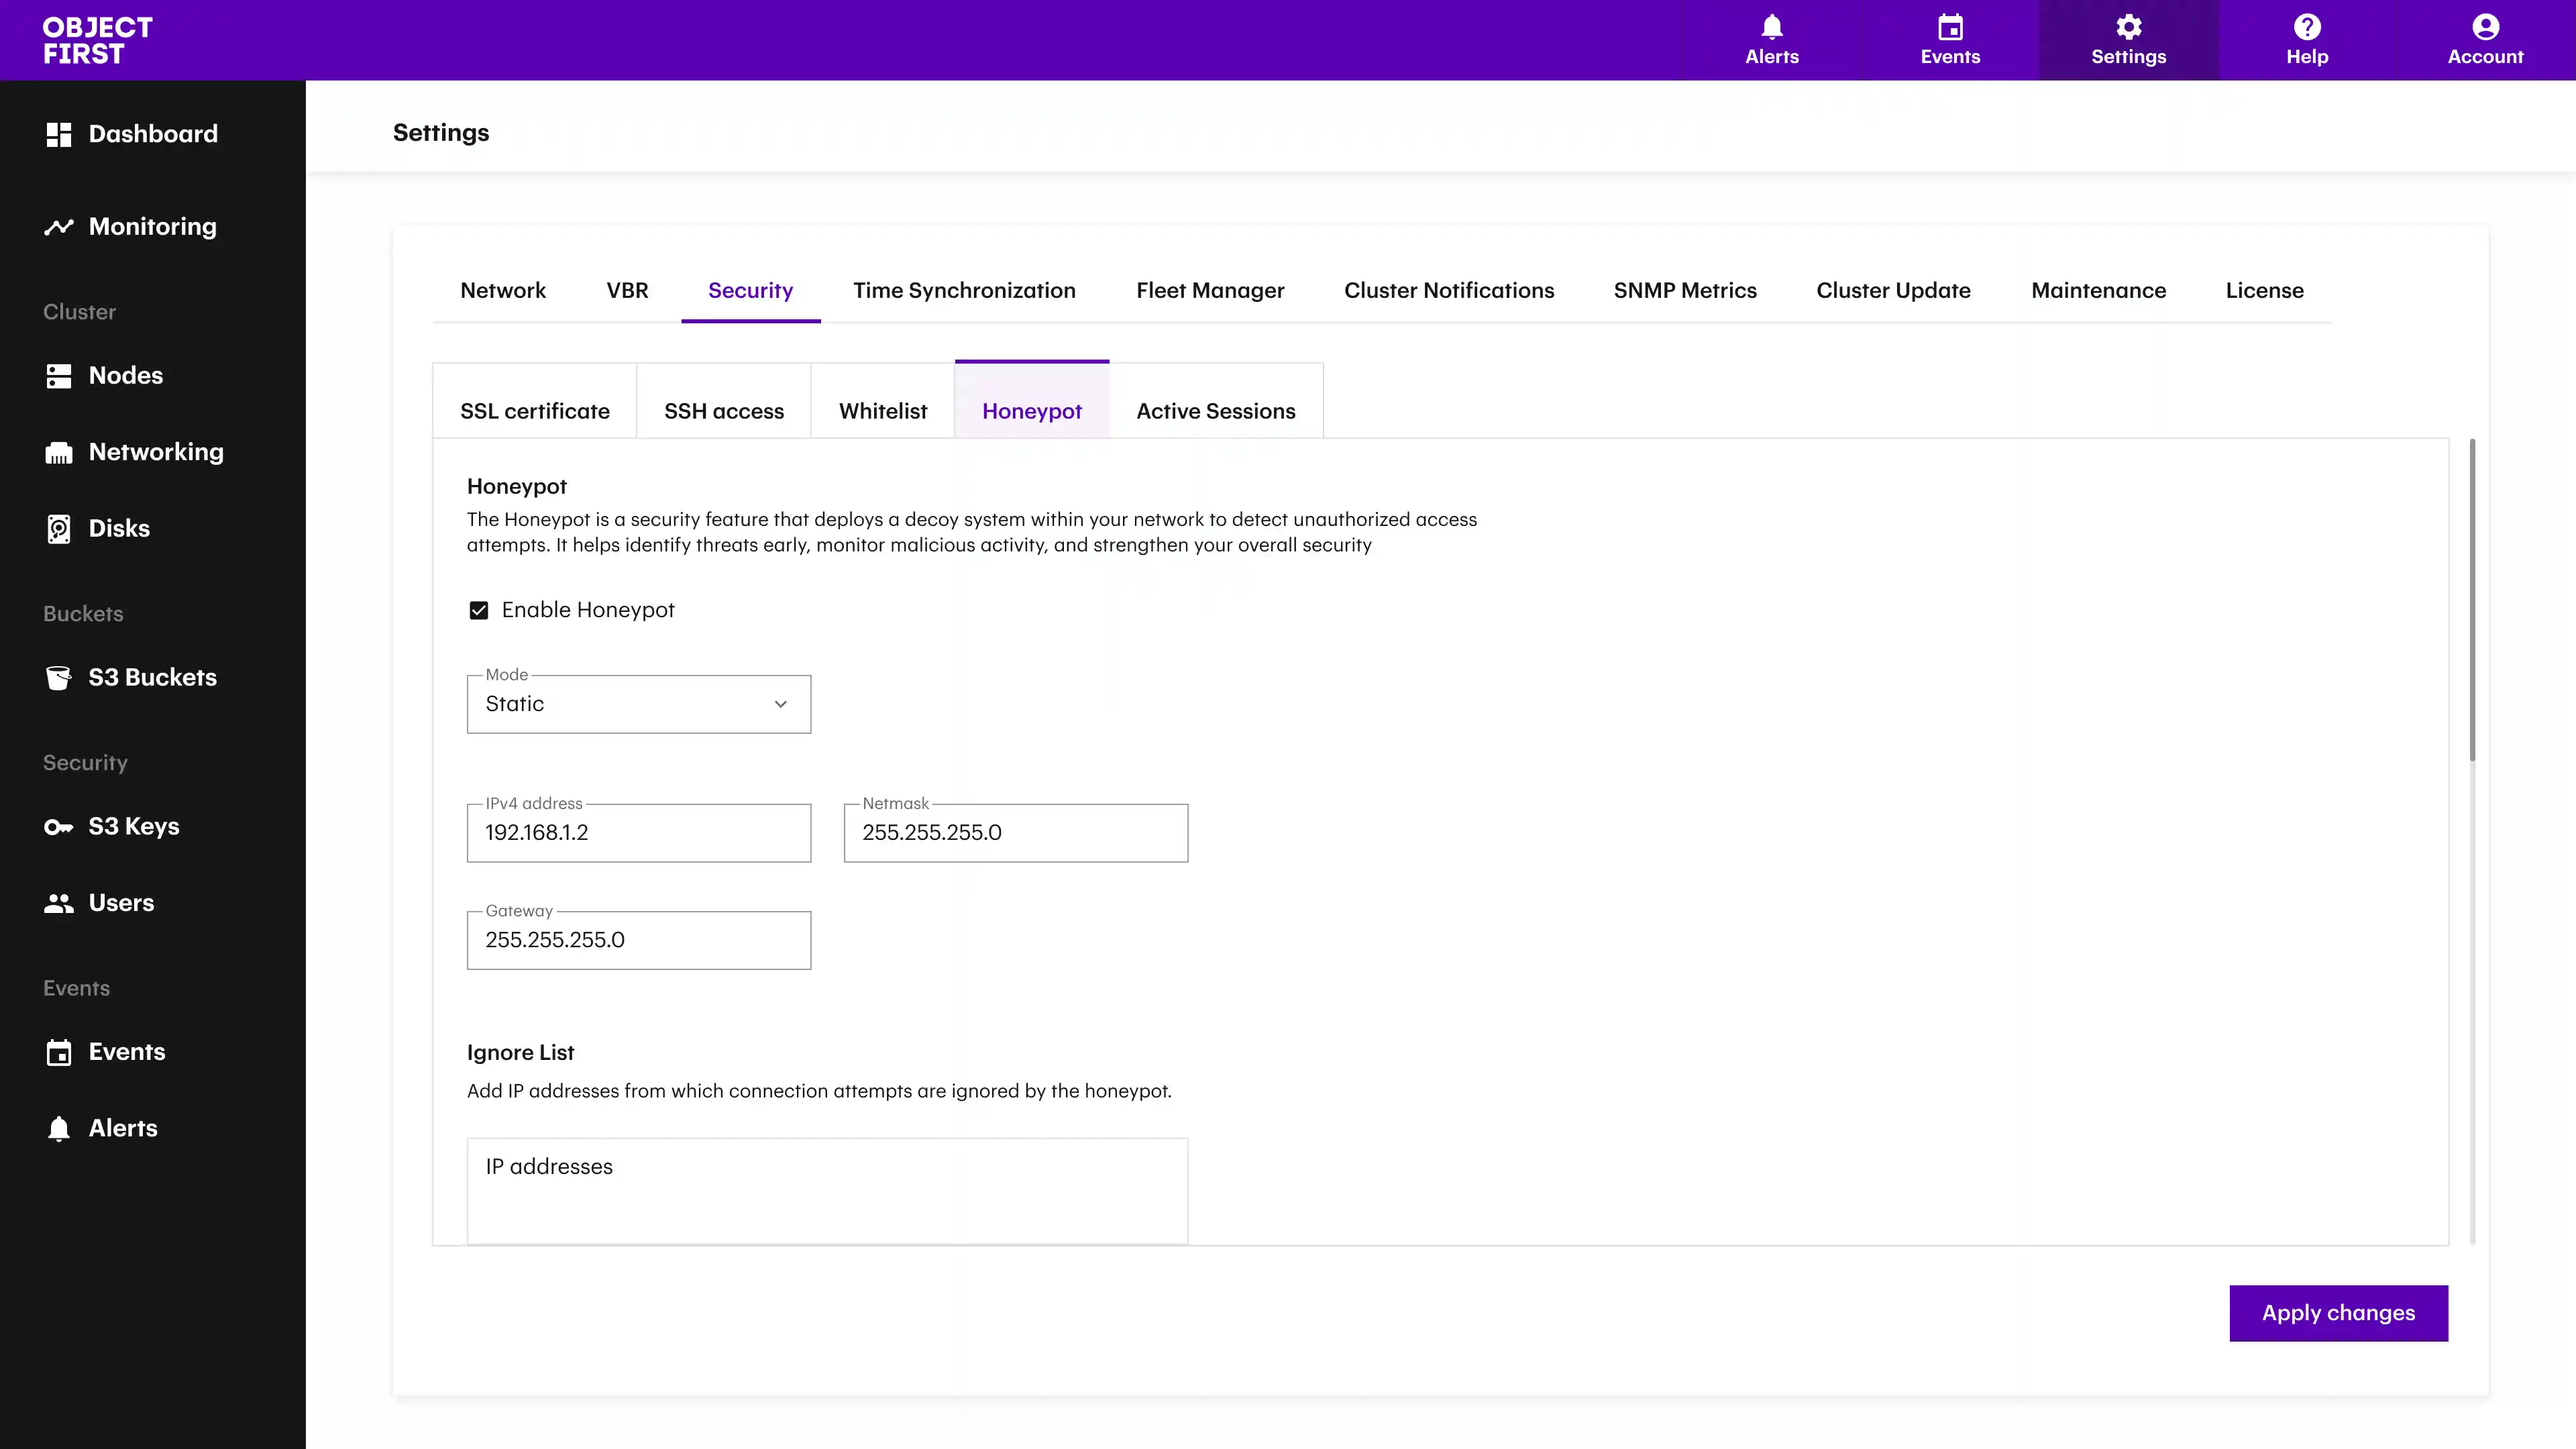
Step 5
