Download Files
| Document Title | Description | Link |
|---|---|---|
| Installation Guide | Get the Ootbi appliance up and running with an Installation Guide, from setup to final configuration. | |
| Support One-Pager | Access essential FAQs and support information for a seamless operation of your Object First solution. | |
| Pre-Flight Checklist | Ensure a smooth Ootbi setup with our 15-minute Box-to-Backup Checklist, covering all key steps. |
Out-of-the-box Instructions
SIDE A
Racking and Connection Instructions
Hardware Configuration
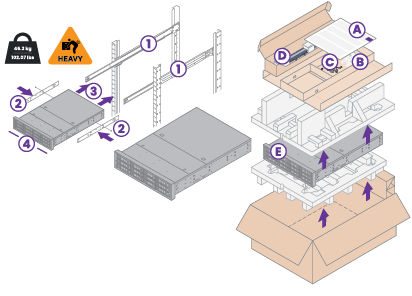
1. Box Contents
A. This guide
B. Power cables
C. Wrist strap
D. Rail kit
E. Ootbi appliance
2. Racking
Note: A multi-person lift or rack platform is suggested.
Note: Please utilize the static prevention wrist strap when appropriate.
1. Mount outer rails in the rack
2. Install inner rails on Ootbi
3. Slide Ootbi into the rack
4. OPTIONAL: Install thumb screw lock (not included in packaging)
3. Connections
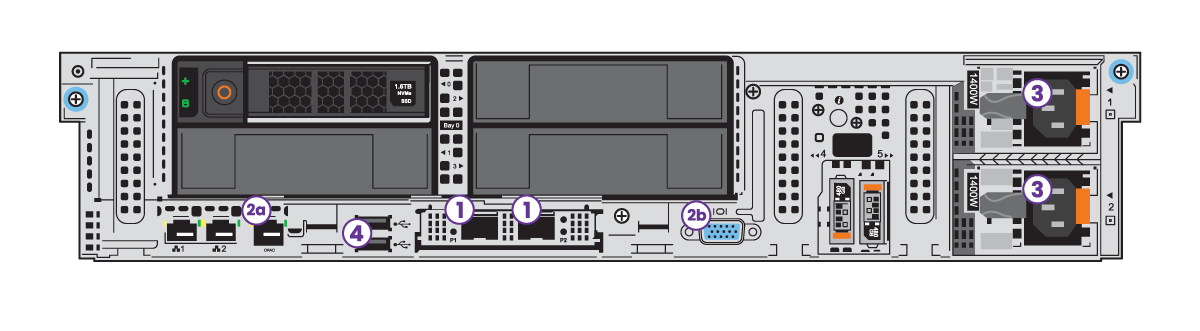
1. Connect existing infrastructure to the 2x 10/25Gb SFP28 ports (1).
Use both ports of the SFP28 network interface for optimized performance and redundancy:
a. These interfaces must be on the same subnet and netmask
b. The cluster IP (virtual) address will be on the subnet
Note: We recommend using two switches for network redundancy. Switches should be connected with inter-switch links.
2. Console Setup: Choose your preferred configuration connection type — Remote via iDRAC or Local Console.
2a. iDRAC Configuration:
a. Connect cable to iDRAC port (2a)
b. Connect power cables (3)
c. Power ON Ootbi
Note: The iDRAC console and access should be secured or restricted to the network. Please do not enable iDRAC connection over the Internet.
d. Get the iDRAC IP address from your DHCP server
e. iDRAC MAC address is on the pull-out tag
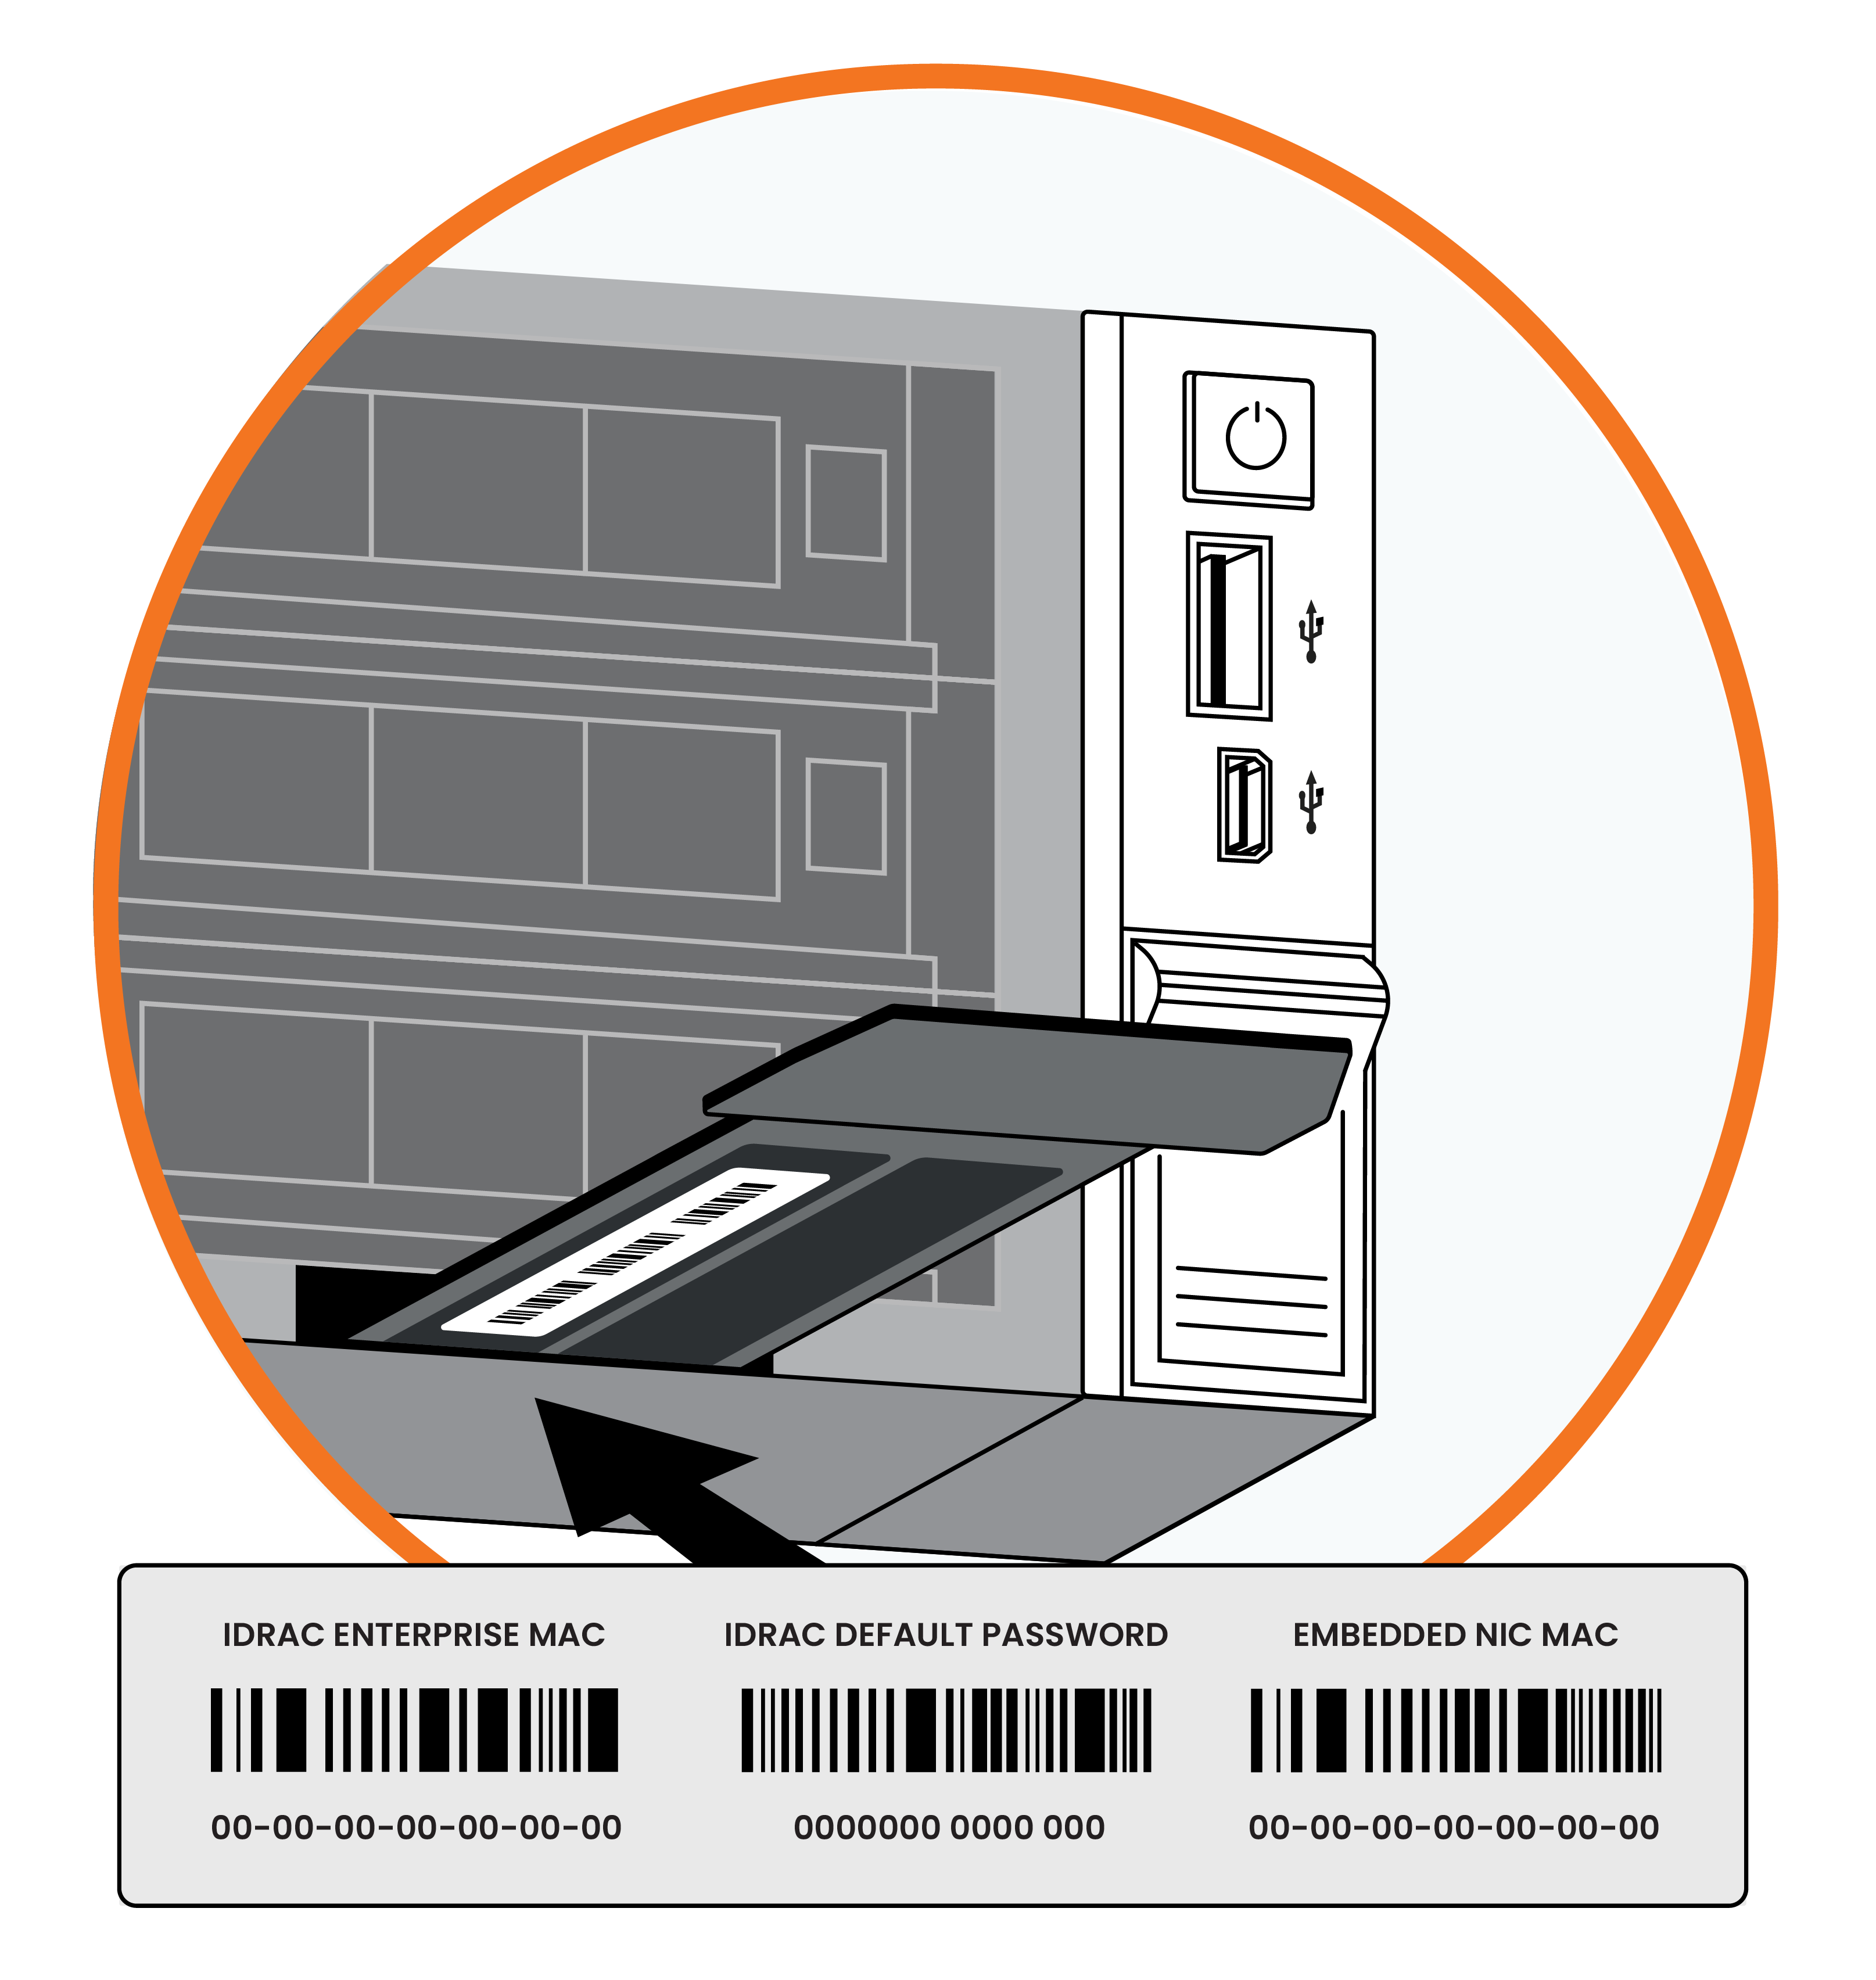
f. Connect to IP address via HTTPS in a web browser (example: https://10.0.0.8)
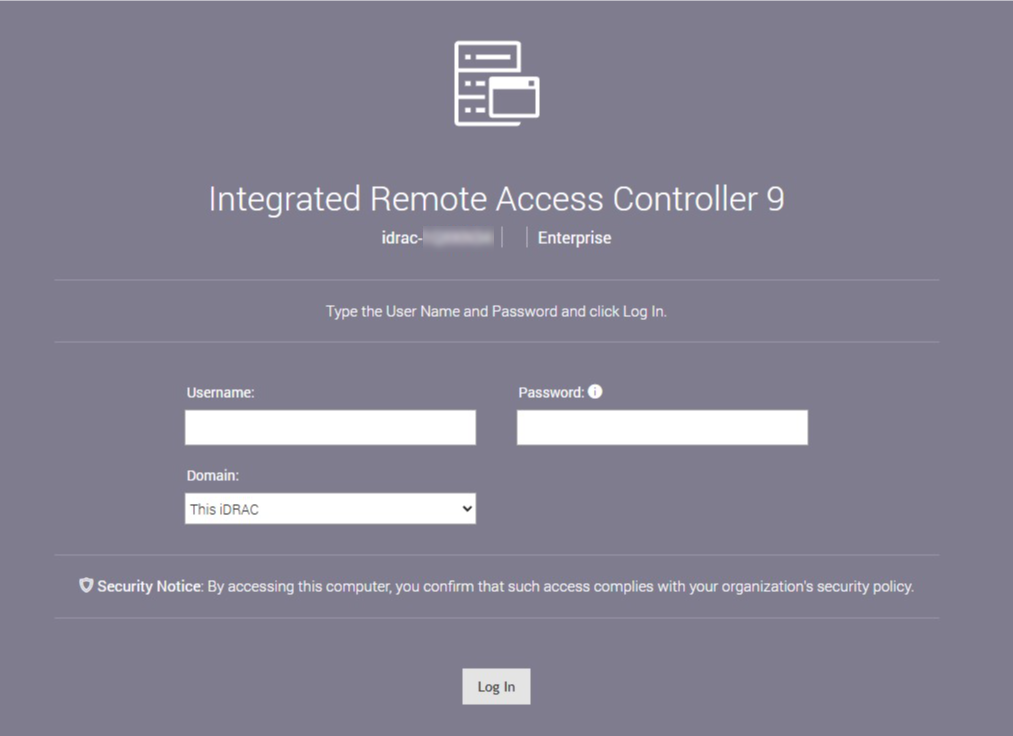
g. Username: root
h. Password: on the pull-out tag
i. Launch Virtual Console
Note: This interface is not used during normal system operations and should be disabled once the system is operational.
2b. Local Console:
a. Connect VGA cable (2b) to a local monitor
b. Connect a USB Keyboard (4)
c. Connect power cables (3)
d. Power ON Ootbi
SIDE B
Ootbi Cluster Configuration
Cluster Configuration
1. Accept the license agreement.
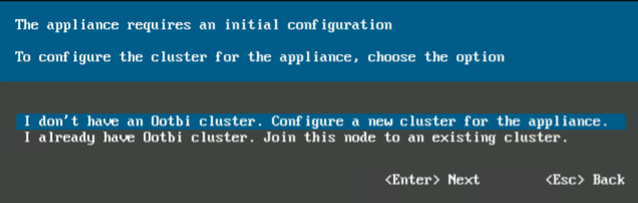
2. Configure a new cluster for the appliance:
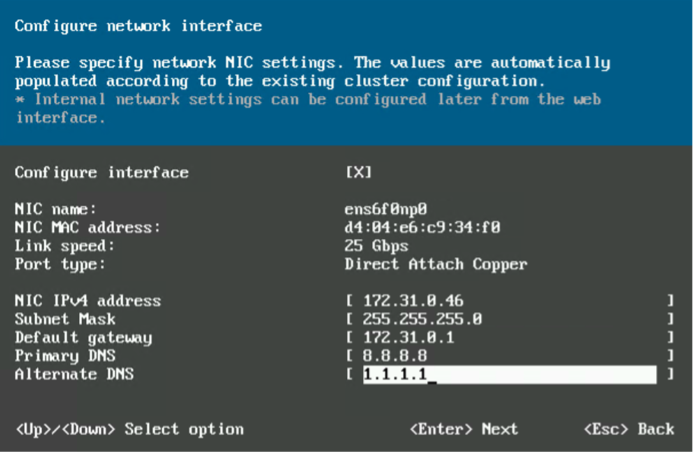
3. Input requested network interface information for both network interfaces.
Note: press the spacebar to activate/deactivate an interface.
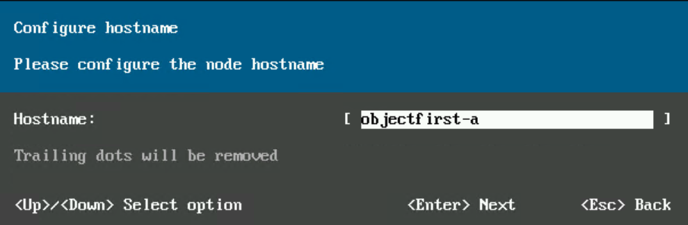
4. Enter a hostname for the node.
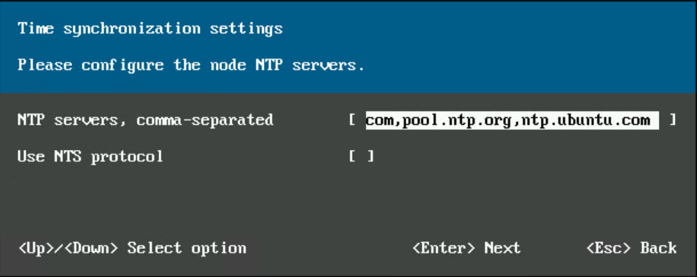
5. Configure the node NTP servers.
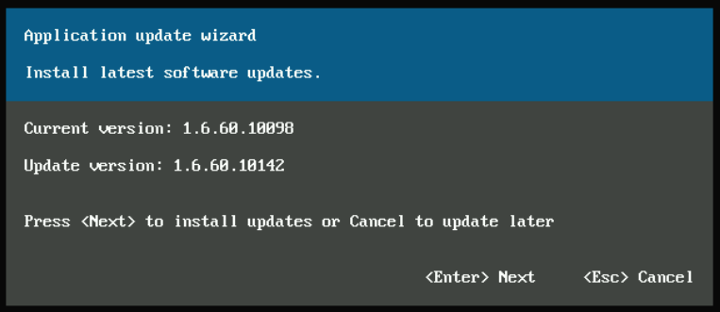
6. Once the networks are configured, the Object First appliance might request an update.
Note: port 443 must be open on your network to pull updates and send telemetry.
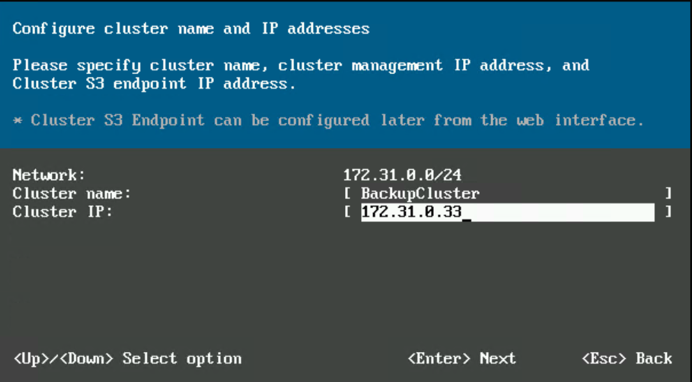
7. Enter a name for the newly created cluster and the IP address for the web interface and cluster management.
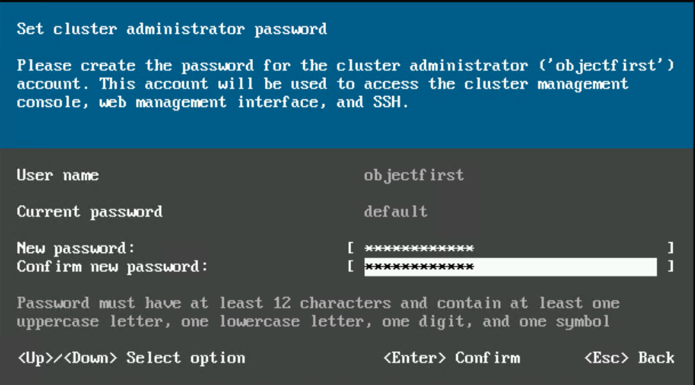
8. Set the administrator password for the node and cluster. These credentials will be used to access Web UI and TUI.
Note: The password should be at least 12 characters long, consisting of one uppercase letter, one lowercase letter, one digit, and one symbol.
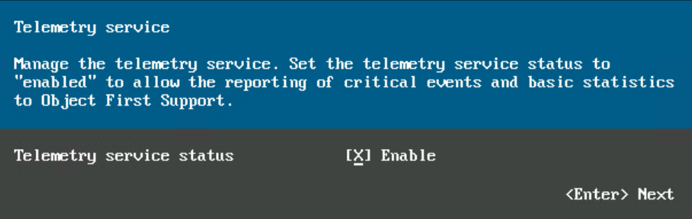
9. Choose to enable telemetry service to allow Object First support monitoring.
10. Your Ootbi hardware has been successfully configured!
Ootbi webUI login
Complete cluster configuration and connection to Veeam
To complete the setup, type the cluster IP address in a web browser with local network access. (Example: https://172.31.0.33)
Object First Support: FAQ
How to Contact Object First Support?
- Through our website’s support portal at https://objectfirst.com/support/
- Via email at [email protected]
- By calling our US number: +1 844 425 3714
The team provides support, 24 x 365 days a year, to address any support issues or questions.
How Do We Prioritize Tickets?
| Severity Level | Description | Response Time |
|---|---|---|
| Severity 1 | Ootbi is not available or server is down | 1 Hour |
| Severity 2 | Ootbi is running in degraded state | 2 Hour |
| Severity 3 | Ootbi is running. General questions and consultations | 4 Business Hours* |
How does Object First Support Collaborate with Veeam?
- We work closely with Veeam to ensure seamless integration and optimal performance. Our collaboration with Veeam is built on a deep understanding of their products.
- Joint investigations are dependent on customers having both Object First and Veeam support.
How are We Different from Other Storage Vendors?
- We liaise directly with Veeam to provide a seamless support experience and communication. Unlike other vendors, we are involved in the case and actively communicate with Veeam.
What are Other Resources?
The Object First Help Center, https://objectfirst.com/help/ , serves as another resource to ensure a smooth deployment and overall product use. You can find the Object First Quick Start Guide, User Guide, How-To Guides, Support & Troubleshooting info, as well as Release Notes on this page.
Service and Support Information
Each Ootbi Unit comes with a 3-year service and support for labor and parts. Our Ootbi warranty service and support includes next business day response, once the issue has been received, diagnosed, and defective parts shipped.