 GB
GBIT Infrastructure & Data Protection Expert
Disaster recovery is about more than just having backups—it's about ensuring you can restore your data when it matters most. But are you confident your system will perform when disaster strikes?
In this blog, we'll guide you through the critical steps of testing your Veeam backups with Ootbi so you can sleep easy knowing your recovery process is rock-solid.
What Is Disaster Recovery Testing
Disaster recovery testing is the process of simulating different failure scenarios to ensure that data, applications, and infrastructure can be recovered efficiently and effectively after an unexpected disruption.
DR testing involves validating the reliability of your backup systems, recovery procedures, and overall disaster recovery plan to minimize downtime and ensure business continuity.
As the saying goes, "People don't care about successful data backups; they care about successful recoveries." There's no room for uncertainty in your organization's hour of need, whether late at night or early in the morning.
You need confidence that your workloads can be fully restored from your backup infrastructure, minimizing downtime and protecting your business from costly disruptions.
Ensuring Resilience in Object Backup Storage
When it comes to object backup storage, there is no exception to the "test and be the best" rule. To simulate a complete disaster where you also lose your VBR server, you need a backup VBR server that is ready and available to perform quick restores.
Losing your VBR server is not a show-stopper during a disaster as long as you follow Zero Trust Data Resilience and segregate your backup storage from your Veeam server.
However, if you simply add your existing repository to the standby VBR server, the latter will attempt to take complete ownership of the repository. This, in turn, could cause issues with the VBR production server.
Step-by-Step Instructions for Veeam DR Testing with Ootbi
In this guide, we'll walk through the step-by-step process of testing your backups using an IAM read-only policy and a standby VBR disaster recovery (DR) server.
Before proceeding, ensure that your object storage supports IAM/STS. For this setup, we'll leverage Ootbi (Out-of-the-Box Immutability) by Object First, which fully supports IAM/STS integration.
- VBR Production Server: 192.168.0.122
- DR Standby VBR Server: 192.168.0.34
- Object Storage (Ootbi): 192.168.0.162
We'll also utilize PowerShell and the AWS CLI to set up our DR user and a restricted DR IAM policy.
Step One: Setup AWS CLI
We’ll use the AWS CLI tool to configure the necessary settings. To install it, run the following command:
msiexec.exe /i https://
To remove any certificate warnings, we’ll need to download the Ootbi root CA and place it in the AWS botocore folder for certificate verification.
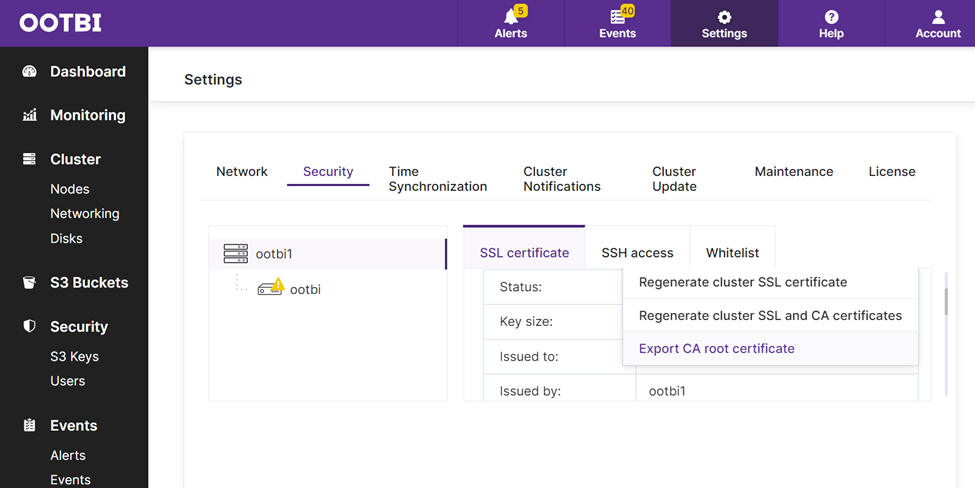
- In the Ootbi settings, navigate to Security, then click Manage under the SSL Certificate tab.
- Click Export CA Root Certificate to download the root certificate.
Next, copy the downloaded ca.cert file to:
C:\Program Files\Amazon\
Make sure to rename ca.cert to cacert.pem.
AWS Profile Setup
Now, we’ll create an AWS profile using the Ootbi admin credentials:
aws configure --profile admin
Insert your access key, followed by your secret key. You can leave the other two prompts blank.
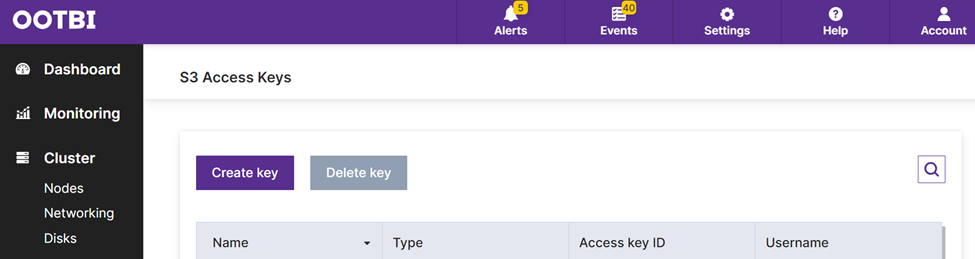
If you’ve forgotten your Ootbi access or secret key, you can create new ones in the Ootbi settings.
Step Two: Create an IAM User in Ootbi
We’ll start by creating an IAM user in Ootbi and applying the restricted policy to this user. After the policy is applied, we’ll create an access key and secret key for the user.
These keys will be used as credentials when connecting the Ootbi repository to the standby DR server.
1. To create the user, use the following command:
aws iam --profile admin --endpoint https://192.168.0.162 --region default create-user --user-name druser

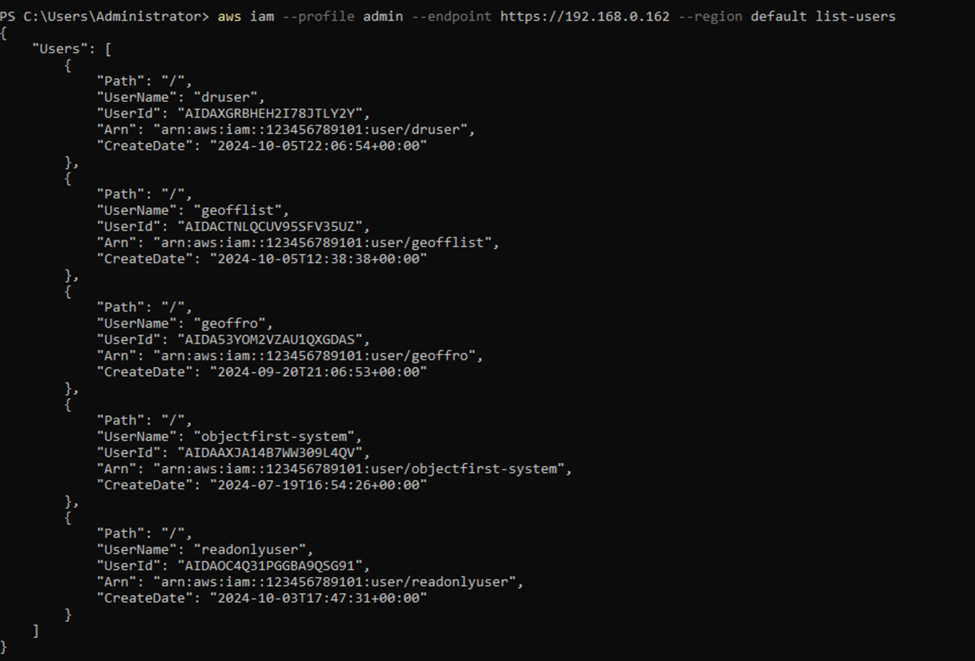
2. You can verify the created users with this command:
aws iam --profile admin --endpoint https://192.168.0.162 --region default list-users
Step Three: Set Up a Restricted IAM Policy
We need to set up a restricted IAM policy to prevent the standby VBR DR server from taking ownership of the production repository during disaster recovery testing.
This policy ensures that the DR server has read-only access and cannot write to the production repository, avoiding any conflicts with the production backup server.
Follow these steps:
- Open Notepad or Notepad++.
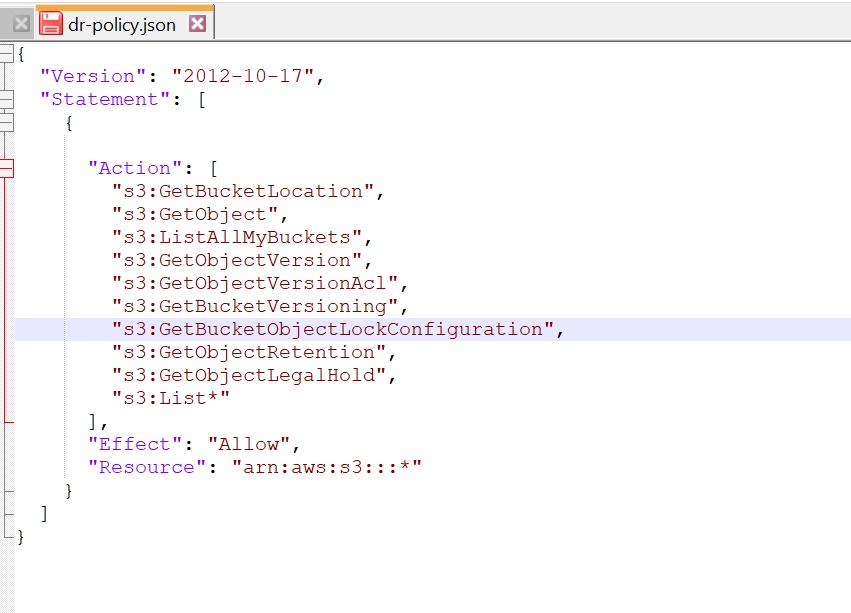
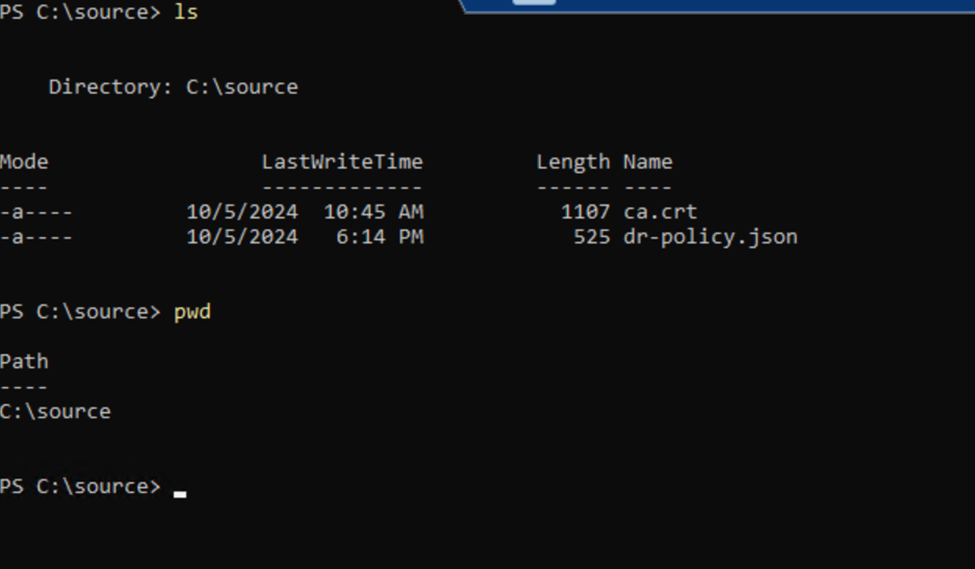
- Copy the following code and save it as dr-policy.json:
{
"Version": "2012-10-17",
"Statement": [
{
"Action": [
"s3:GetBucketLocation",
"s3:GetObject",
"s3:ListAllMyBuckets",
"s3:GetObjectVersion",
"s3:GetObjectVersionAcl",
"s3:GetBucketVersioning",
"s3:GetBucketObject
"s3:GetObjectRetention",
"s3:GetObjectLegalHold",
"s3:List*"
],
"Effect": "Allow",
"Resource": "arn:aws:s3:::*"
}
]
}
3. Make sure to save this file in the same directory where you're running your AWS commands in PowerShell.
Step Four: Attach the Restricted IAM Policy to the DR User
Now that we’ve set up the restricted DR policy, the next step is to attach it to our DR user.
Run the following command to attach the policy to the DR user:
aws iam --profile admin --endpoint https://192.168.0.162 --region default put-user-policy --user-name druser --policy-name dr-policy --policy-document file://dr-policy.json
Verify that the policy has been properly attached by running:
aws iam --profile admin --endpoint https://192.168.0.162 --region default list-user-policies --user-name druser
You should see an output like this:

Step Five: Generate Access and Secret Keys
The final step is creating the credentials to connect Veeam to your production backup repository. These credentials will belong to the DR user and will be governed by the restricted IAM policy we've applied.
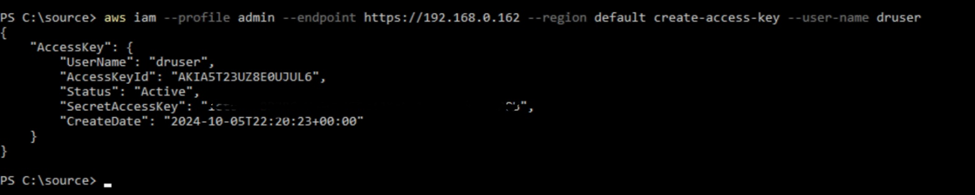
- To create the access and secret keys, run the following command:
aws iam --profile admin --endpoint https://192.168.0.162 --region default create-access-key --user-name druser
Step Six: Connect the Veeam Standby DR Server to the Repository
Now, on your VBR DR standby server, you’ll attach the repository using the read-only credentials we created earlier.
Right-click on Backup Repositories, then select Object Storage.

Choose S3 Compatible.

Ad the service point and, most importantly, input the credentials (access key and secret key) that were created in the previous steps. Click OK, then Next to proceed.


Select the repository bucket you need for the restores and specify the folder.

Continue through the steps, ignoring the warning about taking repository ownership—it will not happen due to the restricted policy. Once the repository is added, perform a rescan.

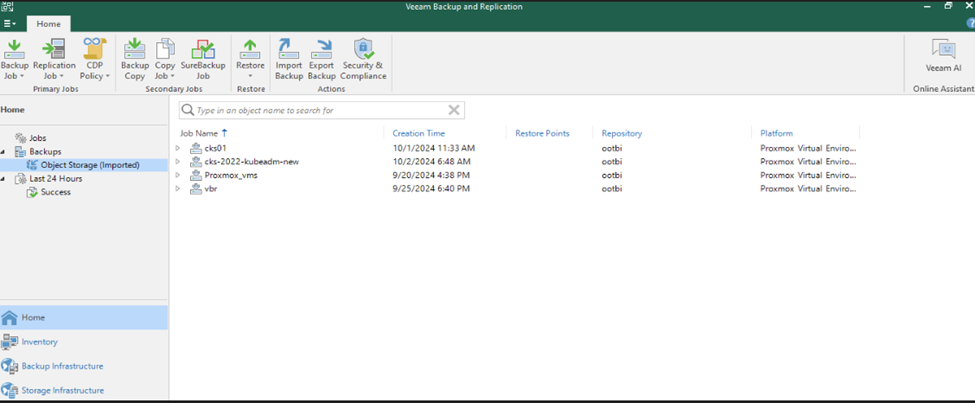
- You should now be able to see your backups.
Step Seven: Test the Restore Process
Now comes the moment of truth since backups are only as good as your ability to restore them.
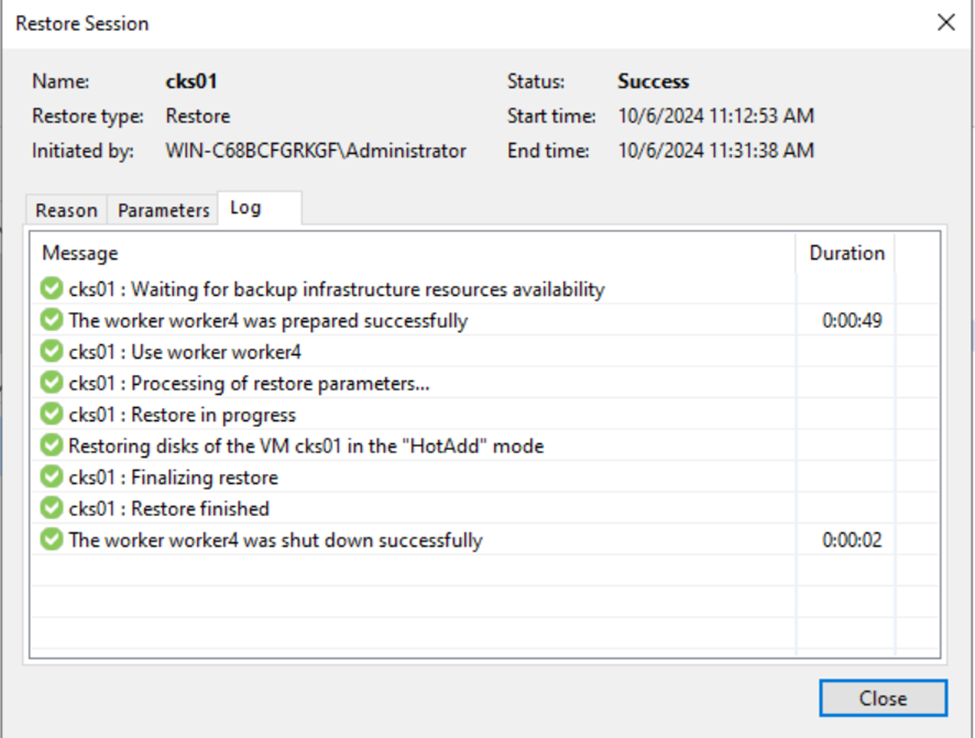
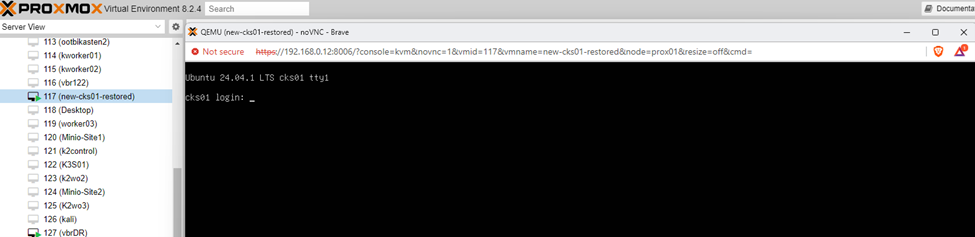
Attempt to restore the entire cks01 VM back to Proxmox by following the instructions below.


When restoring back to the production server, go to the Naming section and make sure to add either a prefix, suffix, or both to the VM name.


Before booting the restored VM, disconnect the network card in the VM settings. This can be done in the Network tab during the restore process or manually after the restore.


Ensure that the option to automatically power on the VM after restore is disabled.


- Once the job is completed:
- Boot up the VM and verify that everything is functioning as expected.
- If needed, you can shut down the production VM to avoid conflicts, or if that's not possible, ensure the network card remains disconnected.
Step Eight: Ensure the Production VBR Server Remains Unaffected
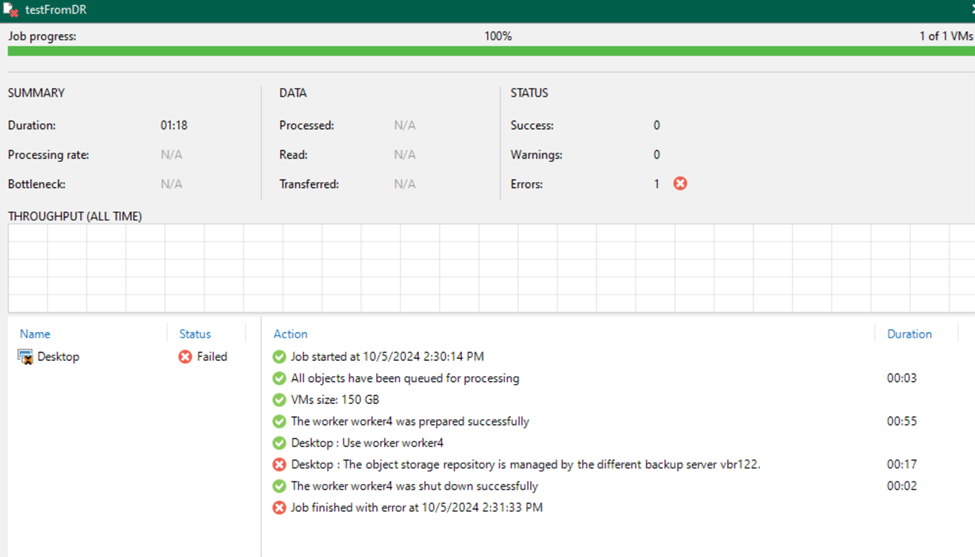
The most important outcome of this test is that the production VBR server remains unaffected. When you try to set up a backup job on the DR server, it will fail with the message:
"The object storage repository is managed by a different backup server."
It confirms that the DR server has not taken ownership of the repository because it was accessed with restricted rights through the IAM policy.
Strengthen Your Backup Strategy with Disaster Recovery Testing
Regular testing of your data protection systems ensures you're fully prepared when disaster strikes. The last thing you want is to face unexpected issues during recovery, so you must be familiar with every step of the process.
By using restricted IAM policies, you can safely test your backups and restore them without risking any impact on your main VBR server.
As a bonus, this process also provides valuable hands-on experience with IAM, which can be useful in other aspects of Veeam Data Protection. Stay tuned for more ways to leverage IAM policies with Veeam in the upcoming blogs.